
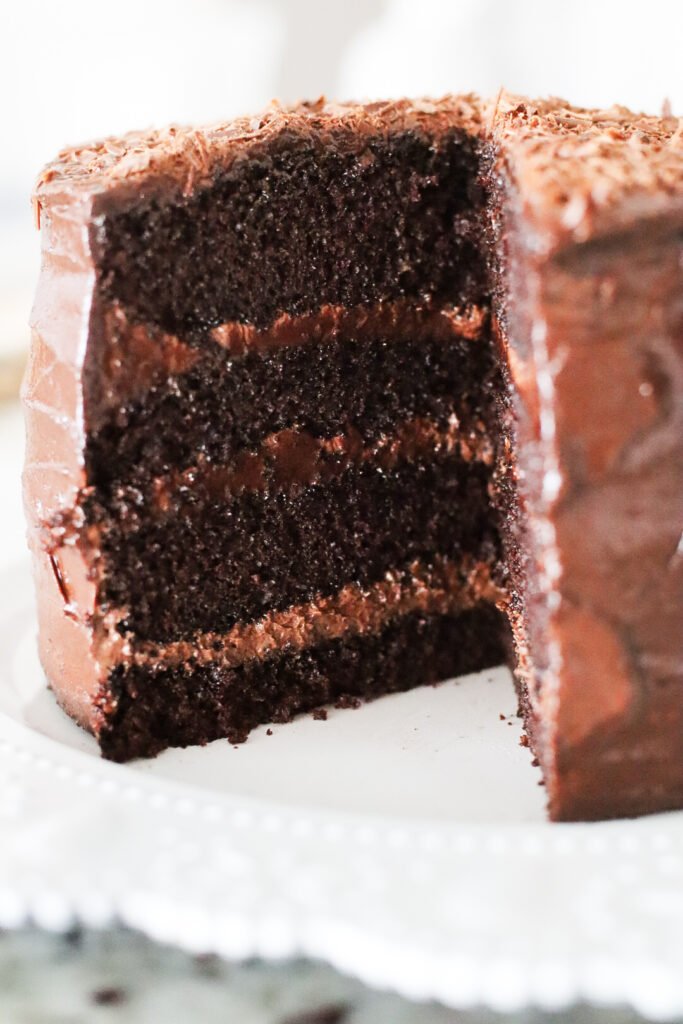
Simple Moist Chocolate Cake Recipe
This simple moist chocolate cake recipe is soft, rich, and perfect for beginners. If you’re looking for an easy chocolate cake recipe that stays incredibly moist and fluffy, this step-by-step guide will help you bake the perfect cake every time. If you enjoy simple bakes like this, you might also love my Chocolate Coffee Sheet Cake or classic Banana Bread.
Why This Simple Moist Chocolate Cake Recipe Works
- Soft crumb: To start, the cake stays incredibly moist and fluffy thanks to the clever combination of oil and boiling water. Together, they create a light, melt-in-your-mouth texture that never feels dry.
- Deep, rich chocolate flavor: Meanwhile, dissolving the cocoa powder in hot water helps bloom the cocoa, intensifying the chocolate flavor while still keeping the batter beautifully light.
- Simple, no-fail method: Best of all, the recipe follows a straightforward, beginner-friendly approach. With clear instructions, step-by-step photos, and helpful ingredient explanations, achieving perfect results every time feels totally doable.
- Easy to customize: Finally, this cake is wonderfully versatile. Layer it with chocolate buttercream, drizzle it with ganache, or finish with fresh berries to make it uniquely yours.
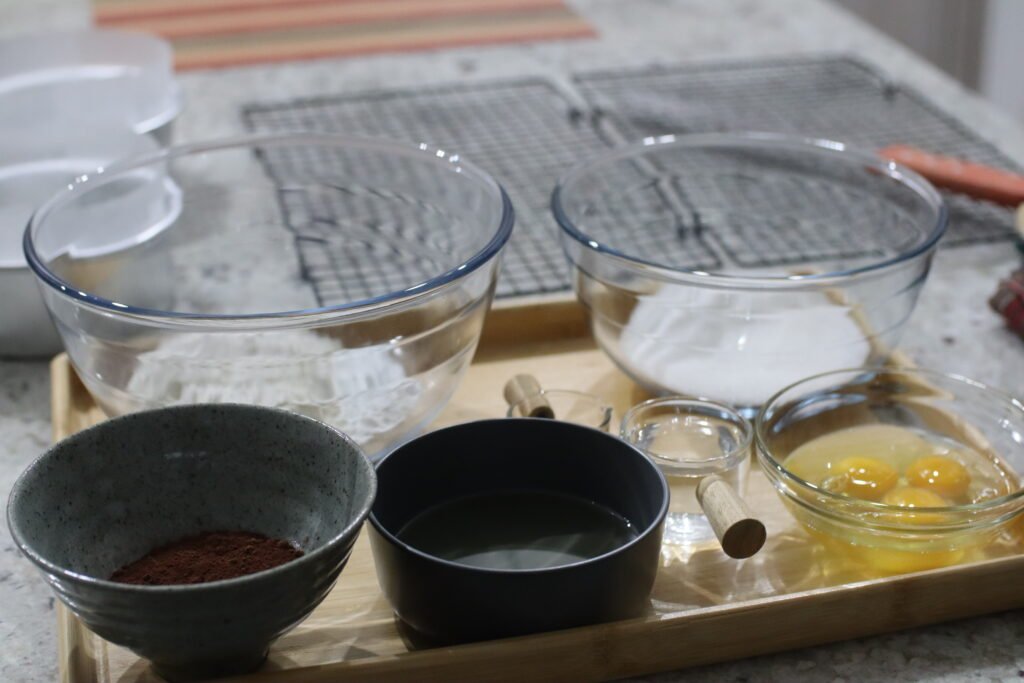
Ingredients
Chocolate Sponge:
Eggs: Eggs provide structure and moisture to the cake. When whisked with sugar until light and fluffy, they incorporate air, which in turn helps the sponge rise and gives it a soft texture.
Granulated White Sugar: Sugar sweetens the cake and also helps create a soft crumb. Beating it with eggs ensures a light and airy sponge.
Vegetable Oil: Oil adds moisture without making the cake heavy. It keeps the sponge soft for longer than butter alone.
Cocoa Powder: Cocoa gives chocolate flavor and color. Dissolving it in boiling water before adding to the batter enhances the flavor and ensures a smooth, rich mixture.
Boiling Water: Hot water helps dissolve the cocoa powder, intensifying the chocolate flavor while keeping the batter light. It also makes the sponge slightly more tender.
All-Purpose Flour: Flour provides structure. Sifting it with baking powder ensures an even, lump-free mixture that rises consistently.
Baking Powder: Baking powder acts as a leavening agent, helping the cake rise evenly and giving it a light texture.
Vanilla Extract: Vanilla enhances the chocolate flavor and adds aromatic sweetness that balances the richness of the cocoa.
Salt: Salt is essential to balance sweetness and enhance the chocolate flavor. Even a small pinch makes a noticeable difference.
Chocolate Buttercream:
Butter: Butter is the base of the frosting. Whipping it with icing sugar creates a light, airy texture that’s easy to spread.
Icing Sugar: Sweetens the buttercream and helps achieve a smooth, creamy consistency.
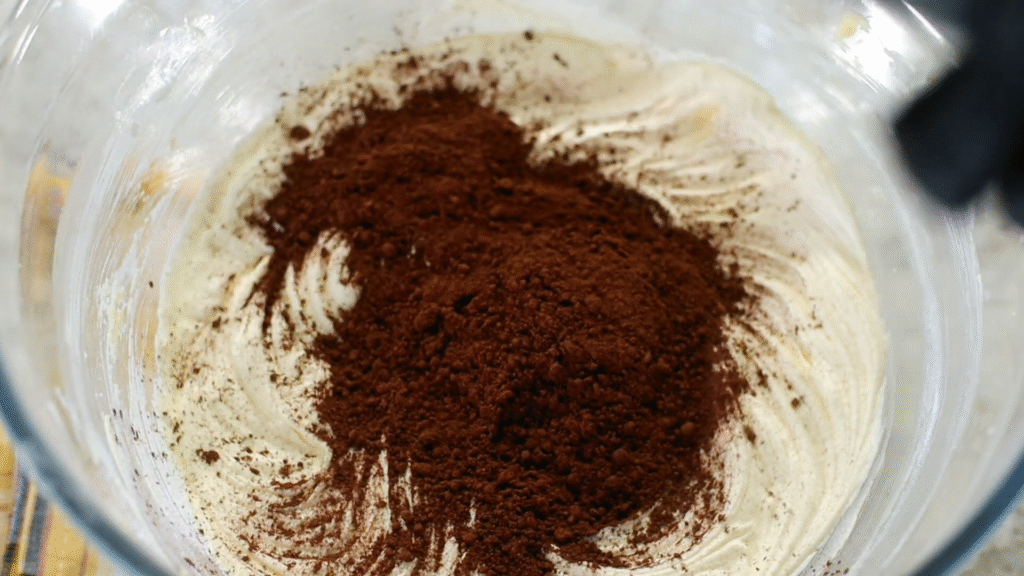
Cocoa Powder: Adds chocolate flavor to the frosting, complementing the sponge.
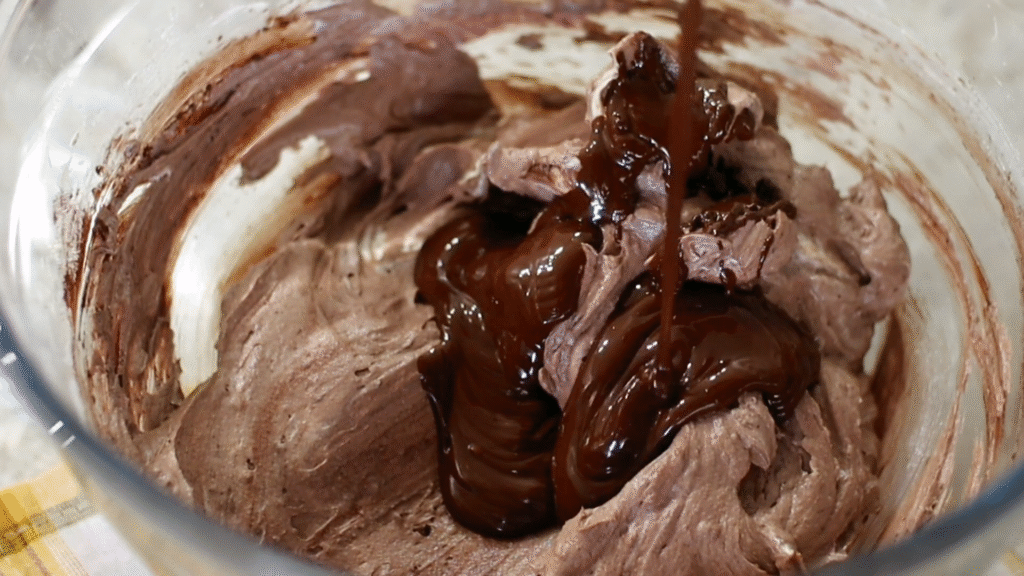
Dark Chocolate Chips: Melted into the buttercream, chocolate chips enrich the flavor and give a luxurious texture.
How to Make This Simple Moist Chocolate Cake
Chocolate Sponge:
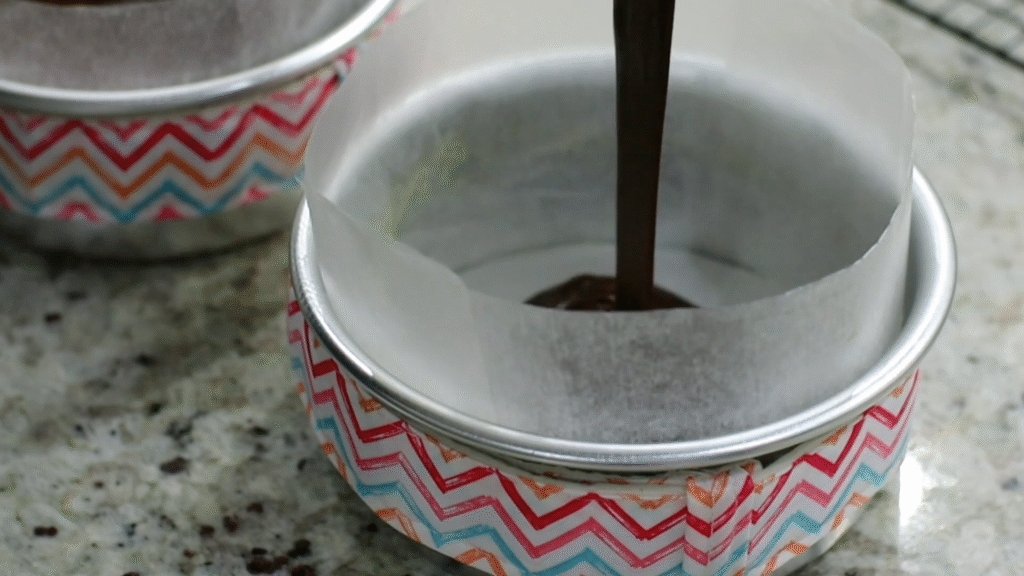
Step 1: Preheat the oven to 180°C. Grease two 6-inch baking tins and line the bottoms with parchment paper.
Tip: You can use cake strips around the tin. They help the cake bake more evenly, prevent doming, and keep the edges from drying out. This results in a flatter, softer cake with a more uniform crumb.

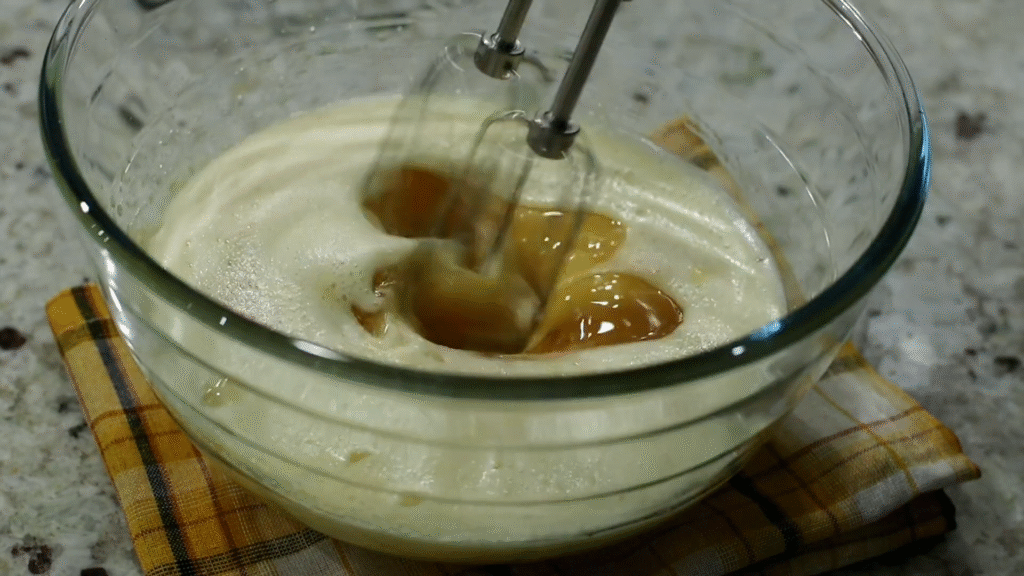
Step 2: Whisk eggs and sugar together in a large bowl until pale and fluffy. This creates a light sponge that will rise beautifully.
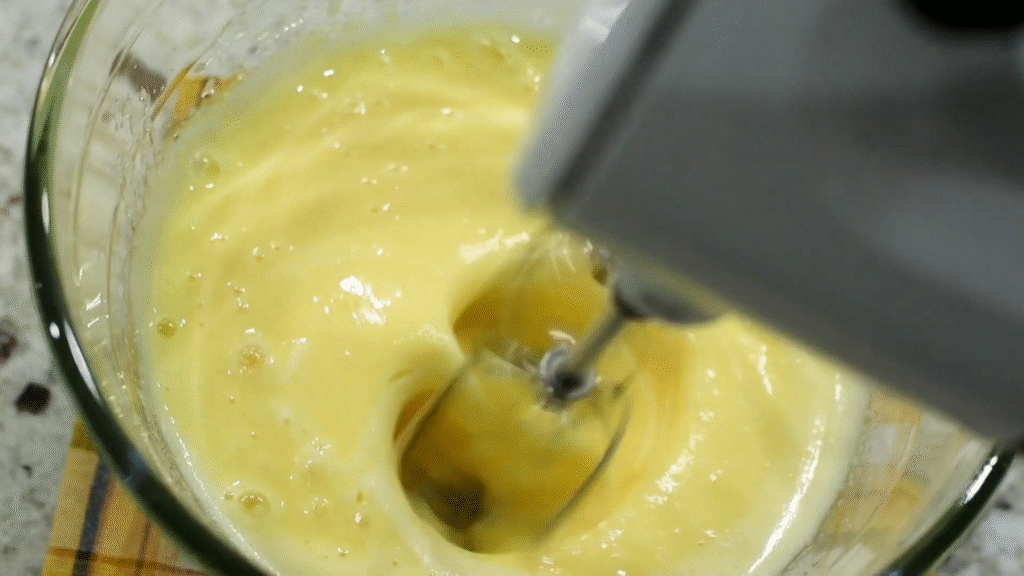
Step 3: Add vanilla extract and oil to the egg mixture and mix well until fully combined.
Step 4: Sift together flour, baking powder, and salt. Fold gently into the wet mixture until smooth. Avoid overmixing, as this can make the sponge dense.

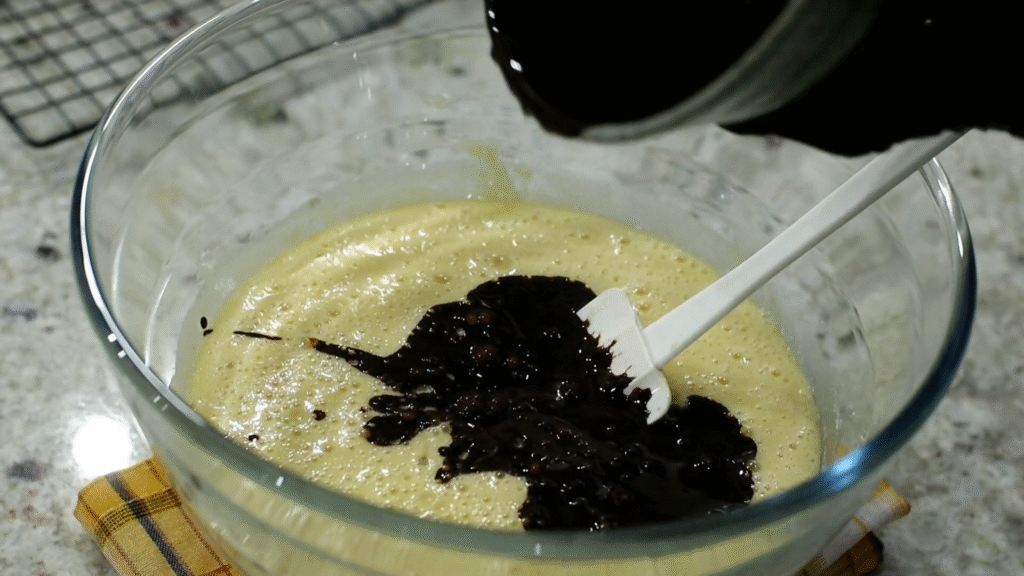
Step 5: Dissolve cocoa powder in boiling water and add it gradually to the batter. Mix gently until the batter is uniform and glossy.
Step 6: Divide the batter evenly between the two prepared tins. Smooth the tops with a spatula.
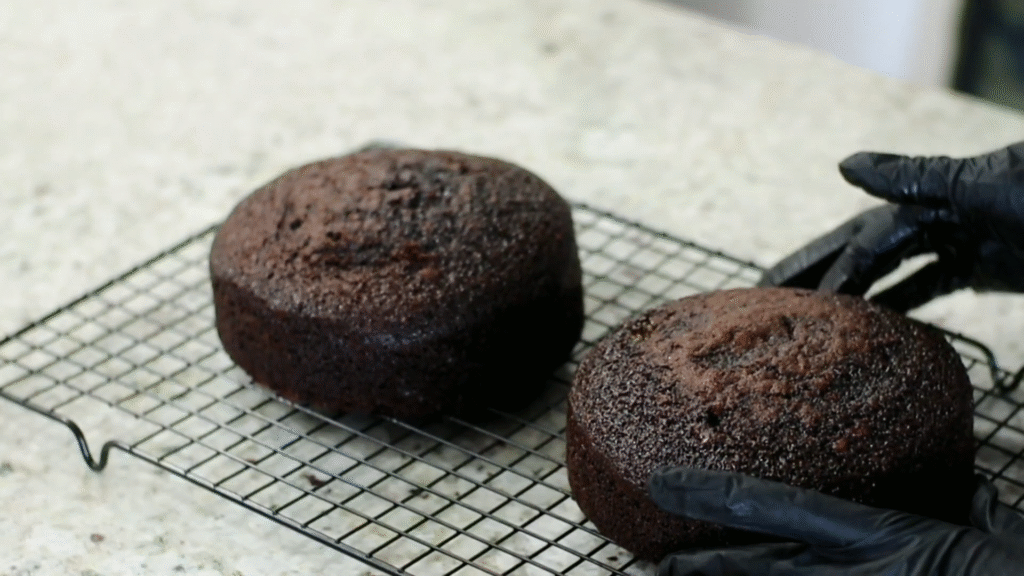
Step 7: Bake for 30 minutes at 180°C. Check with a toothpick; it should come out clean. Oven temperatures vary, so adjust as needed.
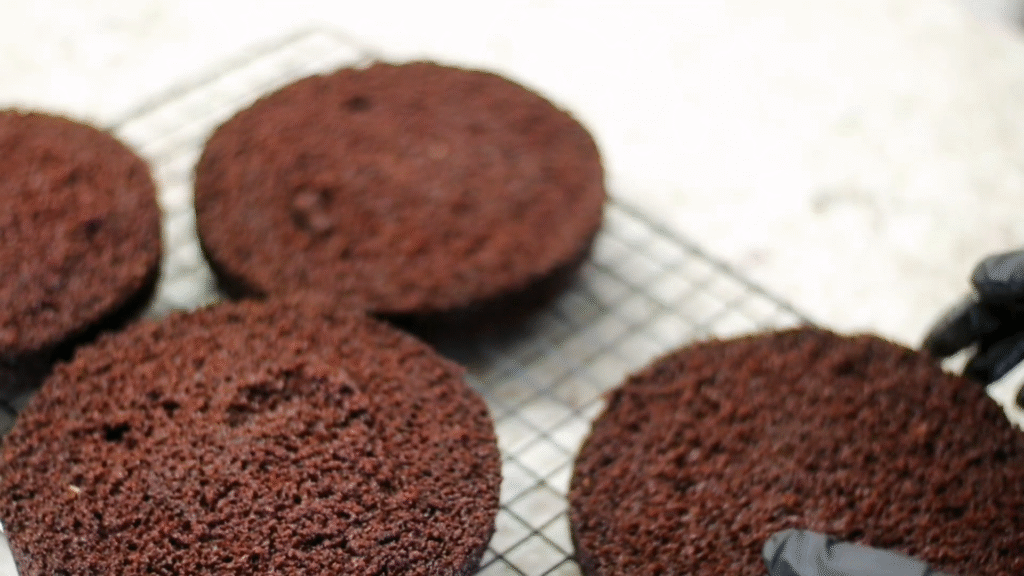
Step 8: Let the cakes cool in the tins for 10 minutes, then transfer to a wire rack. Allow to cool completely before layering.
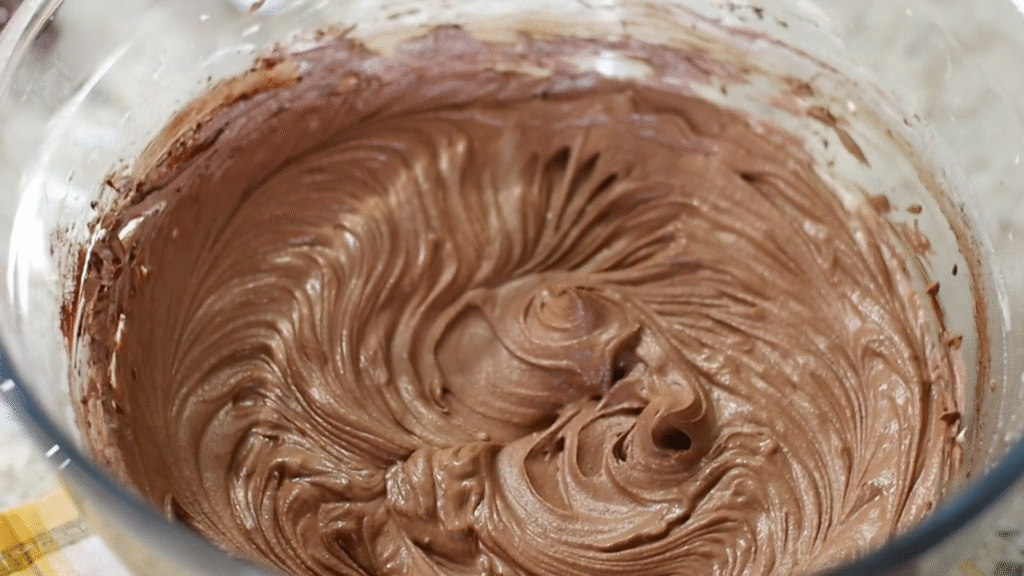
Chocolate Buttercream:
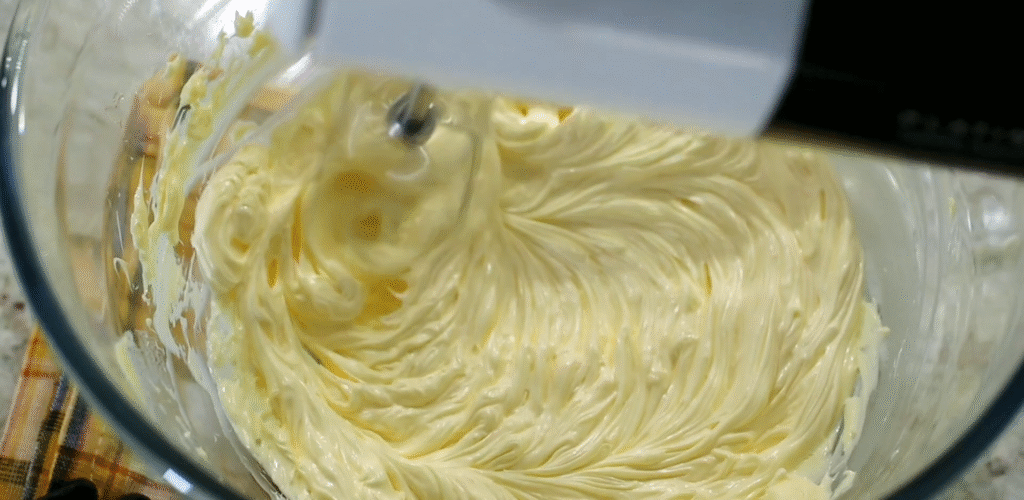
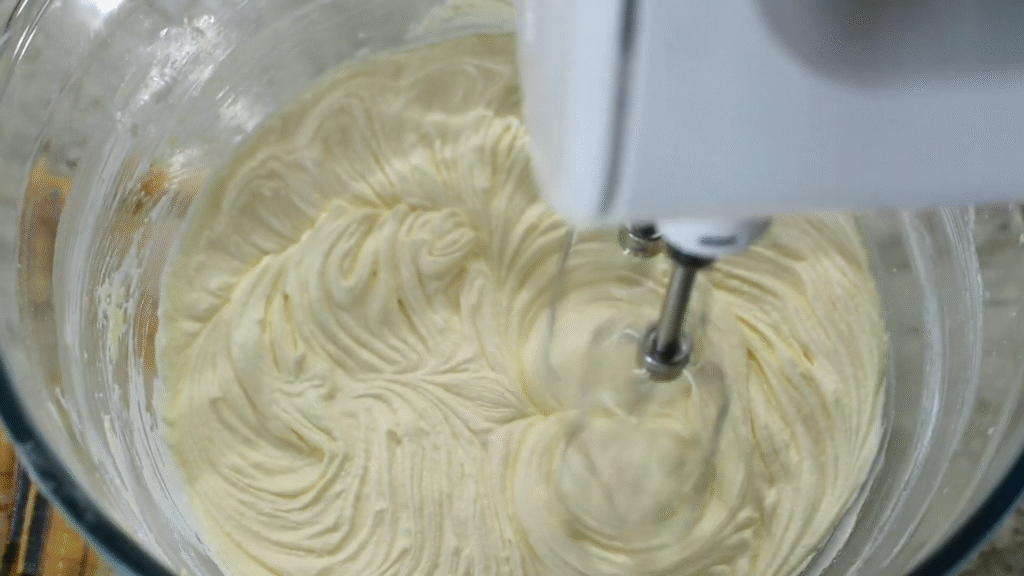
Step 1: Whip the butter in a bowl until soft and creamy.
Step 2: Gradually add icing sugar while continuing to mix until light in color and fluffy.
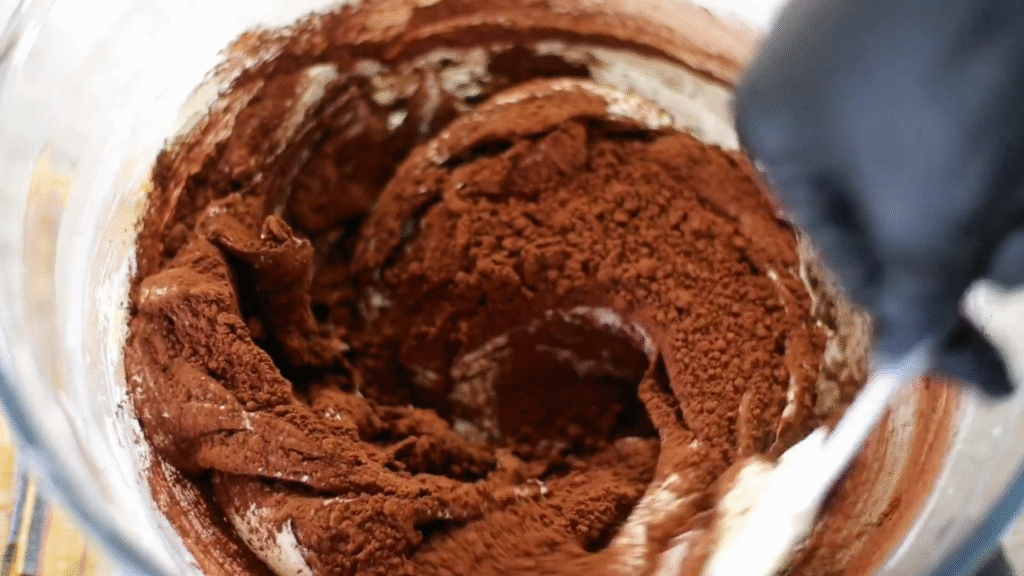
Step 3: Add cocoa powder and melted dark chocolate chips and mix until smooth and creamy.
Assemble the Cake
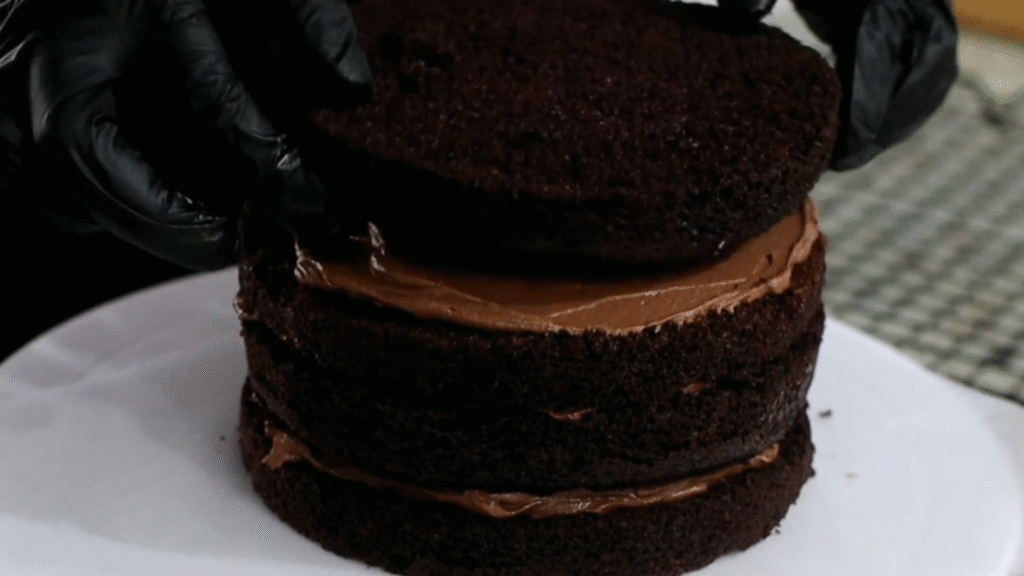
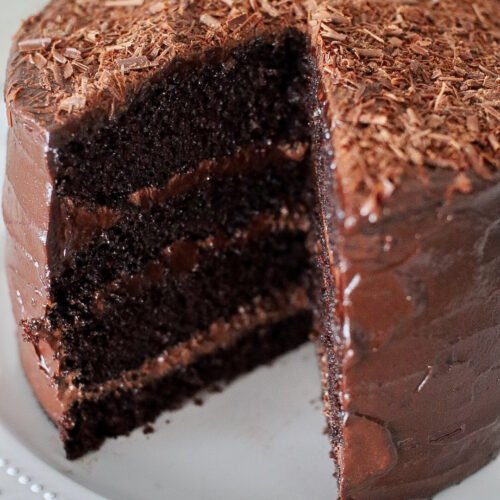
Step 1: Slice each sponge layer in half so you end up with four thin layers. This makes the cake taller and allows for more buttercream between layers.
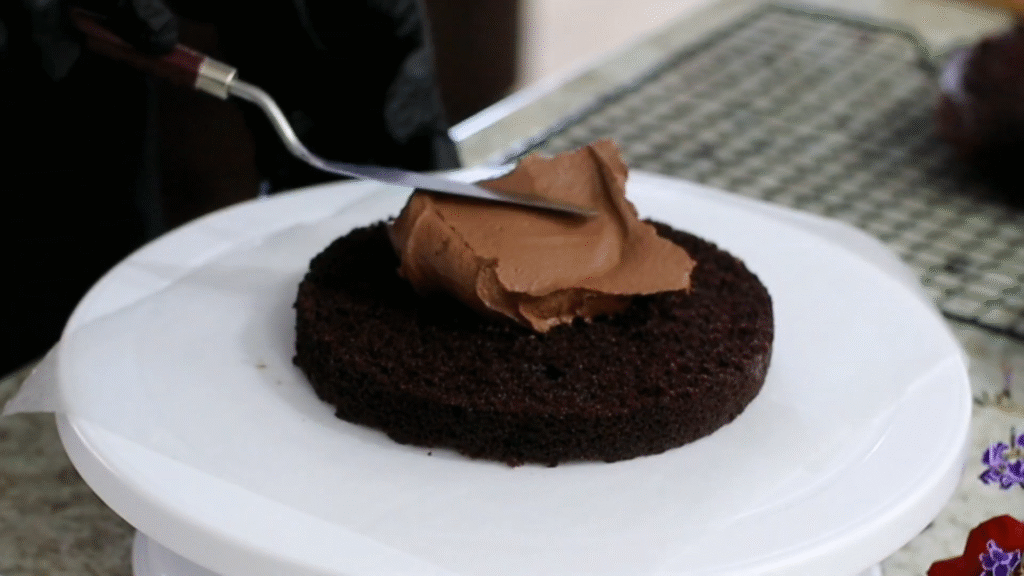
Step 2: Place the first sponge layer on a serving plate. Spread a generous layer of buttercream evenly on top.
Step 3: Place the next sponge layer on top and spread more buttercream. Continue until all four layers are stacked.
Step 4: Spread the remaining buttercream evenly over the top and sides of the cake. Smooth with a spatula for a clean finish.
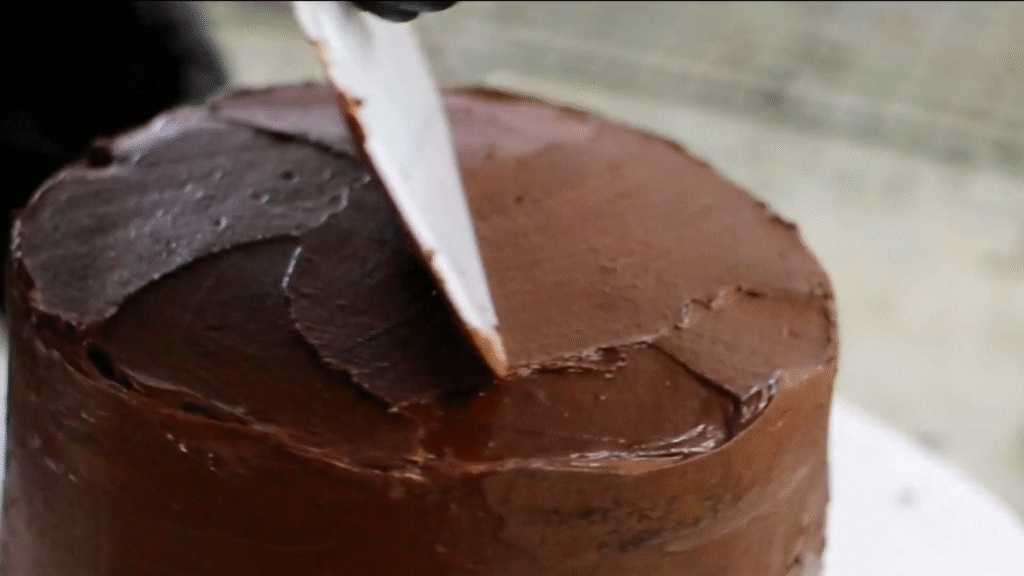
Step 5: Decorate as desired. You can top with chocolate shavings, chips, or fresh berries. Optionally, drizzle with chocolate ganache for extra indulgence.

Make-Ahead and Storage Tips
- Make-ahead: You can definitely get a head start! Bake the sponges a day in advance, wrap them tightly in plastic wrap, and refrigerate overnight. Then, simply frost them when you’re ready to serve.
- Freezing: Want to save some for later? Wrap your baked cakes in both plastic wrap and foil to lock in freshness, and freeze for up to 2 months. When it’s cake time again, just thaw in the fridge overnight before frosting.
- Storage: Like my Lemon Poppyseed Cake, this cake stays soft and moist for days. Once frosted, your cake can sit at room temperature for 1–2 days, perfect if you’re serving it right away. For longer keeping, pop it in the fridge where it will stay fresh for up to 4 days.
Frequently Asked Questions
How do you make a moist chocolate cake?
A truly moist chocolate cake comes down to a few simple but important details. Using oil instead of butter keeps the cake soft for longer, while adding hot water helps bring out a deep, rich chocolate flavor. Together, they create that tender, melt-in-your-mouth texture we all love.
What makes a chocolate cake soft and fluffy?
That light, fluffy texture comes from properly whisking the eggs and sugar until they’re pale and airy. It’s also important to mix the batter gently and not overdo it. This keeps the cake soft instead of dense.
Can I use this recipe for cupcakes?
Definitely! This batter works beautifully for cupcakes. Just pour it into lined cupcake trays and bake for about 12–15 minutes. They turn out just as soft, moist, and perfect for sharing (or keeping all to yourself!).
Did You Try This Recipe?
If you tried this Simple Moist Chocolate Cake, I’d love to hear how it turned out! Leave a comment and rating below. and share your experience. Your feedback helps other readers bake with confidence and inspires me to keep creating and sharing more comforting recipes.
More cake recipes you’ll love:
Ingredients
- 3 eggs
- 1 cup (250ml) sugar
- 1/2 cup (125ml) vegetable oil sunflower
- 1/2 cup cocoa powder
- 3/4 cup boiling water
- 1 cup (250ml) cake flour
- 10 ml baking powder
- 5 ml vanilla essence
- 1/2 tsp salt
- 200 g butter
- 2 cups (500ml) icing sugar
- 1/2 cup (125ml) cocoa powder
- 3/4 dark chocolate chips, melted
Instructions
Chocolate Sponge
- Preheat the oven to 180°C. Grease two 6-inch baking tins and line the bottoms with parchment paper.
- Whisk eggs and sugar together in a large bowl until pale and fluffy.
- Add vanilla extract and oil to the egg mixture and mix well until fully combined.
- Sift together flour, baking powder, and salt. Fold gently into the wet mixture until smooth. Avoid overmixing, as this can make the sponge dense.
- Dissolve cocoa powder in boiling water and add it gradually to the batter. Mix gently until the batter is uniform and glossy.
- Divide the batter evenly between the two prepared tins. Smooth the tops with a spatula.
- Bake for 30 minutes at 180°C. Check with a toothpick; it should come out clean. Oven temperatures vary, so adjust as needed.
- Let the cakes cool in the tins for 10 minutes, then transfer to a wire rack. Allow to cool completely before layering.
Chocolate Buttercream
- Whip the butter in a bowl until soft and creamy.
- Gradually add icing sugar while continuing to mix until light in color and fluffy.
- Add cocoa powder and melted dark chocolate chips and mix until smooth and creamy.
Assemble the Cake
- Slice each sponge layer in half so you end up with four thin layers. This makes the cake taller and allows for more buttercream between layers.
- Place the first sponge layer on a serving plate. Spread a generous layer of buttercream evenly on top.
- Place the next sponge layer on top and spread more buttercream. Continue until all four layers are stacked.
- Spread the remaining buttercream evenly over the top and sides of the cake. Smooth with a spatula for a clean finish.
- Decorate as desired. You can top with chocolate shavings, chips, or fresh berries. Optionally, drizzle with chocolate ganache for extra indulgence.
Notes
- For a moist texture: Using oil instead of butter helps keep the cake soft for longer, while hot water enhances the chocolate flavor and creates a tender crumb.
- Don’t overmix: Gently fold the dry ingredients into the batter to keep the cake light and fluffy.
- Check doneness: Ovens vary, so start checking at 25 minutes. A toothpick inserted in the center should come out clean.
- Cupcake version: Divide the batter into cupcake liners and bake for 12–15 minutes.
- Storage: Store at room temperature for 1–2 days or refrigerate for up to 4 days.


Amazing cake!! I will have to try!
Thank you Claudia! I’m so glad you like it 💕 Enjoy!!!